Let’s reach those #kitchengoals, with a neat fridge and a sorted pantry. By taking the time to organize, you’ll know what you have, what you need, and what’s going bad–reducing food waste and improving your meal planning game!
In this blog, you’ll learn:
-How to organize your fridge and pantry
-How to keep your kitchen neat so you always know what you have in stock
-About zero waste products that can help you reach these goals
Step 1: Take everything out
First, start by finding out what you already have! Pull everything out of the fridge, toss or compost those leftovers that got lost in the back, and check your expiration dates. Take this opportunity to wipe down all of your shelves so you can start fresh and feel great about your new routine!
Step 2: ‘Contain’ yourself
Combine and consolidate
Do you have two half-full jars of pickles? How about a few partially used boxes of pasta? Combine these items into one jar, box, or bag to avoid any duplicates. Our mission here is to have a clear idea of how much of each ingredient you own, avoiding any accidental purchases at the store.

#plasticfreegoals
Now’s the time to transition closer to your plastic free goals. For items that came in plastic bags, move these to a clear container and try to purchase these plastic free in the future!
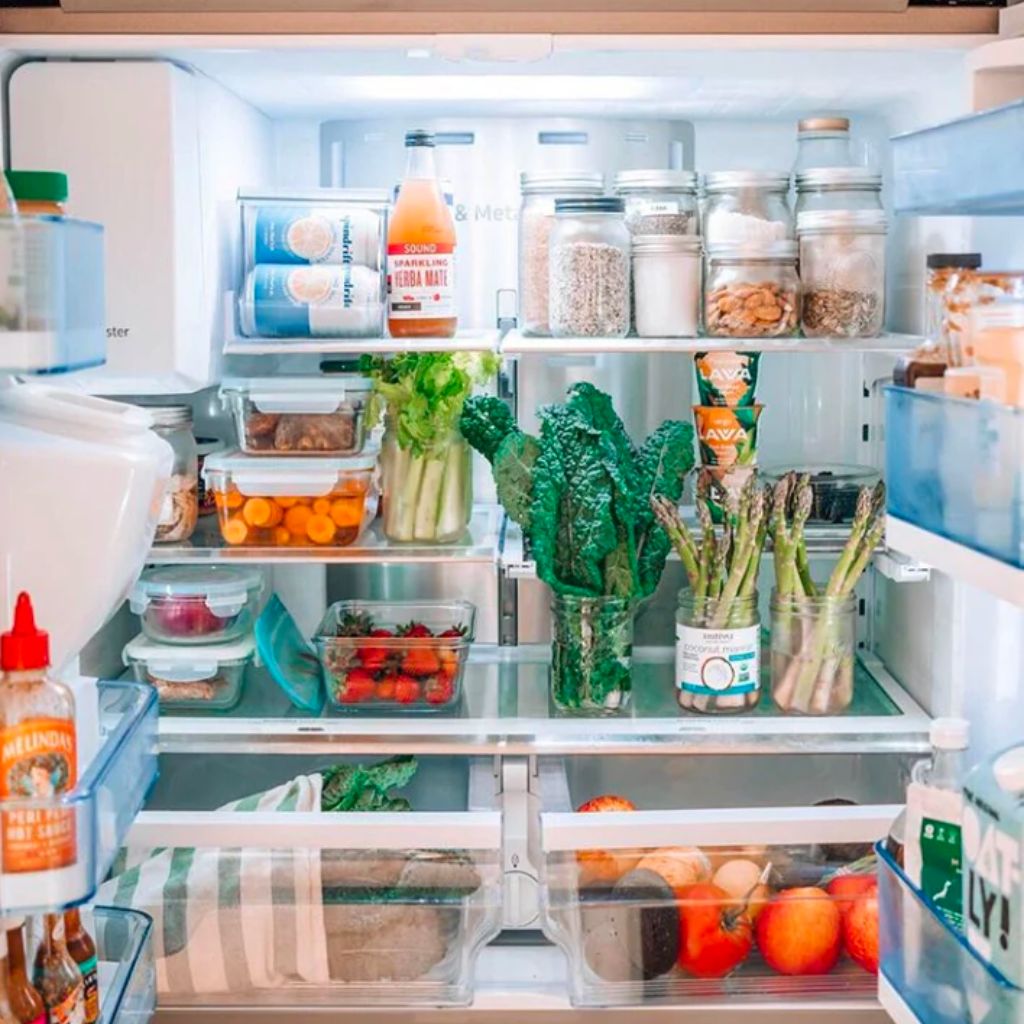
Use recycled glass jars or mason jars to make it easy to see nuts, grains, and flours. Stasher bags are great to keep your smoothie-ready frozen fruit from getting frostbitten. Create the fridge that you want to maintain, and try to adjust your shopping habits to avoid any unnecessary transfers.
Keep in mind, this doesn’t mean that you should buy items in plastic, just to transfer them once you get home! Instead, use this as inspiration for what plastic free can feel like. Once you have your pantry laid out with mason jars and Stasher Bags, you’ll want to keep it that way. Next time you see your flour jar run low, check out your bulk aisle at the store to refill plastic free using your bulk bags.
Meal prep to success
Do you ever think about cooking, then shy away from the idea of chopping, slicing, and dicing? You’re not always going to be in the mindset to meal prep, so do it ahead of time when you’re feeling energized! Go ahead and slice up those peppers, dice your onion, and chop your carrots so it’ll be easy to toss ’em into the pan on Tuesday night after you get home from the gym. We recommend Frego glass containers and Stasher bags for plastic free storage to keep your prepped veggies fresh.
Step 3: Sort and organize
Now it’s time to start putting things back into their designated place. It’s important to have a plan here so that you can stick to it and efficiently use what you have!

Use your shelves efficiently
Most refrigerators have adjustable shelves, so you can make it work for your food items. Have you always found that bottom shelf too short for anything to fit? Do you need an extra inch for that brand of tea that you always buy to fit on the top? Now’s the time to create your perfect layout, so putting items away will be a breeze.
Do you find that your veggie drawer needs cleaning a little more often than others? Line it with a thin towel to make it easy to shake out those dried up leaves and crumbs that inevitably end up there!
Once you’re done with the fridge, take a look at your pantry as well and see what options you have to adjust your arrangement there. Do you need a few containers that would help keep some of the smaller items together? What about a spice rack? Take note of a few key items that would help make things more visible and less cluttered.

Group like-items together
When you’re cooking, it’s much easier to throw something together when it’s already together. That means put your sun dried tomatoes, artichoke hearts, pasta, and sauce all near each other in your pantry or fridge! This will help you avoid forgetting an essential ingredient, or leaving an item to gather dust in the back of the pantry.
The same goes for baking ingredients! Keep your flour, sugar, and baking powder all on the same shelf, so you’ll always know where to find all of the ingredients you’ll need for your signature banana bread.
In the fridge, this means keeping your ready-to-eat items up front. Have an easy-to-see section for your already made meals, so you can grab and go quickly. Keep your snacks front-and center to avoid playing the “I don’t have anything to eat” game. Whole veggies, meats (and meat substitutes), and cheeses, can get grouped in drawers so you always know where to find them (plus the drawers keep them extra-fresh!)
Step 4: Maintain the system
Now that you have your row of clear jars showing what’s in your pantry, a section for your prepared meals in the fridge, and have ousted any expired ingredients, you have to keep it this way…

Refill, don’t replace
You have perfectly good containers at home keeping your food–you don’t need to buy new ones every time you’re running low! Instead, look for bulk options when you shop. Peanut butter, flour, nuts, grains, and snacks all commonly come in a bulk option, so you can just bring your bulk bags, fill them up, and then replenish your containers when you get home!
Avoid plastic in the produce aisle
Many produce options come in two options: wrapped in plastic, and not wrapped in plastic. Instead of going for the bagged spinach, try choosing the bundled spinach that’s plastic free! Avoid pre-cut vegetables at the store, and opt to do a little extra work on your part to reduce the overall waste. You’ll probably save some money, too!

Keep up with leftovers
By keeping your leftovers and prepared meals all in one place in the fridge, you can make sure nothing gets left behind. Hot tip: write the ‘made on’ date on each container so you can eat the oldest, first! You can purchase chalk stickers, or you can write directly on Stasher Bags and and Frego containers with a dry erase marker.
Keep half-cut fruits and veggies towards the front of your vegetable drawer, so you use those first. Use Food Huggers to keep the cut portions from going bad too soon…no more sad half-peppers! Plus, did you know that you can keep herbs like cilantro and parsley fresher by keeping them in a jar with some water?
Organizing your food can be satisfying, and will make it much easier, and more fun, to cook in the kitchen. You’ll save money by buying less, and have a better sense of the ingredients that you have on hand so you can make culinary masterpieces.
Bookmark this blog and check back every 6 months to see how your kitchen is keeping up. You may need to clean everything out again to start anew, and that’s okay! Every time you clean out your fridge, you’ll find ways to tailor these tips to your own lifestyle. Eventually, you’ll create a process that works for you and brings joy to every meal!

